We offer deformation and strain measurements for the analysis of failure mechanisms or the determination of material parameters both on the specimen surface and inside the specimen. Measurements can be carried out in-house or on your premises.
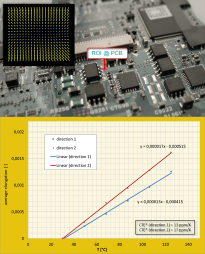
With the optical determination of the strain directly on the material surface, not only the coefficient of thermal expansion (CTE) can be determined as the characteristic value of the material, but above all the thermal expansion in local areas of material composites can be determined advantageously.
Thus, equivalent characteristic values can be provided for the CTE which reflect the real thermal expansion behavior in the material or component composite. Particularly in the field of microelectronics, these more accurate input data are an important basis for reliability evaluations with FE simulation.
In practice, microelectronic systems are exposed to constant temperature changes, which lead to defects, especially in interface areas of the material composites.
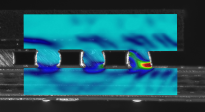
Thermomechanical investigations of the cross section of the microelectronic composite can clarify deformation and failure mechanisms or even be used in the design phase of the microsystems to optimize the connections (e.g. solder or sinter connections). The thermal measurements can be performed in the temperature range from -40°C to 300°C.
To characterise your materials, material composites and components, tests can be carried out under tensile, compression and bending loads. Depending on your requirements, the results are evaluated on the basis of the microDAC® software VEDDAC.
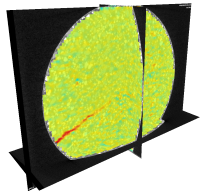
For a comprehensive non-destructive analysis of the material behaviour inside the object to be measured (material, component), computer tomography (CT) provides a complete, high-resolution and three-dimensional image of the object to be investigated.
Internal surfaces can be inspected, any virtual sections can be made through the specimen, cracks and pore distributions in the structure can be analyzed.
With the additional use of microDAC® volume as a method of Digital Volume Correlation (DVC), a quantitative analysis of 3D deformations inside the object is possible.
Depending on your measuring task, we can carry out motion and deformation analyses with our microDAC® measuring systems on your premises.
For this purpose we adapt our camera systems to your task, the measuring object or load technology.
Both industrial camera systems for high measurement resolution and high-speed camera technology for dynamic processes can be used.
- What is the measuring task?
- Which measuring object (photo, drawing)?
- What is the size of the image section that needs to be observed?
- How large are the displacements or strains to be expected?
- How fast is the motion or deformation process?


